How we used chalkboard paint
- Darcy Bush
- Apr 8
- 2 min read

We have a new display for our young creative customers, if you're visiting us with young children (or fancy showing off your own artistic skill) add your creativity to the chalkboard house.
Here's how we achieved it:
Step 1: Prepare the wood
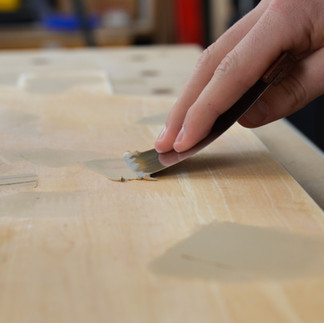
We found an old piece of plywood and prepared the surface by using Toupret Wood Filler. Once dry, we sanded the filler back leaving a smooth surface.


Step 2: Masking
We wanted a bare wood border, and also to test out Indasa Precision masking tape, so we masked off the area that wouldn't be painted. The precision tape leaves a clean and sharp paint line.

Step 3: Priming Next we primed the surface in a colour similar to the top coat. For this we used Bradite One Can in the Matt finish. Bradite One Can is an all-in-one prime, block and finish suitable for interior and exterior projects, available in matt and eggshell finishes.


Step 4: Painting
Once the primer was fully cured we went on with the first coat of the chalkboard paint. We used Blackfriars Chalkboard paint (available in 500ml and 1L), which gives an 'easy-to-write matt black finish' for interior use. The product is solvent based and painting equipment must be cleaned with white spirit.
With a recoat time of 16 hours, we revisited the project the next day to apply the second coat (ensure the second coat is applied within 3 days).

Step 5: Remove the masking
Once almost dry, remove the masking. For best results remove tape at an angle.

Step 6: Start creating
The canvas was ready for creativity and two of our customers completed the first piece of art, an invitation to others to add to the chalk garden! We used some of our hardware to create a fun place to store the chalk and cloth.


Comments